Oracle Database 11g Installation PDF Version
Unpack FilesUnzip the files.# 11.2.0.1 unzip linux.x64_11gR2_database_1of2.zip unzip linux.x64_11gR2_database_2of2.zipYou should now have a single directory called "database" containing installation files.Hosts File
The"/etc/hosts" file must contain a fully qualified name for the server.<IP-address> <fully-qualified-machine-name> <machine-name>Pre-requisite Installation Add the following lines in the "/etc/sysctl.conf" file.fs.suid_dumpable = 1 fs.aio-max-nr = 1048576 fs.file-max = 6815744 kernel.shmall = 2097152 kernel.shmmax = 536870912 kernel.shmmni = 4096 # semaphores: semmsl, semmns, semopm, semmni kernel.sem = 250 32000 100 128 net.ipv4.ip_local_port_range = 9000 65500 net.core.rmem_default=4194304 net.core.rmem_max=4194304 net.core.wmem_default=262144 net.core.wmem_max=1048586Run the following command to update the current kernel parameters./sbin/sysctl -pAdd the following lines to the "/etc/security/limits.conf" file.oracle soft nproc 2047 oracle hard nproc 16384 oracle soft nofile 4096 oracle hard nofile 65536 oracle soft stack 10240Install the following packages.# From Redhat Enterprise Linux 5 DVD cd /media/cdrom/Server rpm -Uvh binutils-2.* rpm -Uvh compat-libstdc++-33* rpm -Uvh compat-libstdc++-33*.i386.rpm rpm -Uvh elfutils-libelf* rpm -Uvh gcc-4.* rpm -Uvh gcc-c++-4.* rpm -Uvh glibc-2.* rpm -Uvh glibc-common-2.* rpm -Uvh glibc-devel-2.* rpm -Uvh glibc-headers-2.* rpm -Uvh ksh* rpm -Uvh libaio-0.* rpm -Uvh libaio-devel-0.* rpm -Uvh libgomp-4.* rpm -Uvh libgcc-4.* rpm -Uvh libstdc++-4.* rpm -Uvh libstdc++-devel-4.* rpm -Uvh make-3.* rpm -Uvh sysstat-7.* rpm -Uvh unixODBC-2.* rpm -Uvh unixODBC-devel-2.* rpm -Uvh numactl-devel-* cd / ejectCreate the groups and users required.groupadd oinstall groupadd dba groupadd oper groupadd asmadmin useradd -g oinstall -G dba,oper,asmadmin oracle passwd oracleAdditional Setup
The following setup tasks must be performed regardless of which setupmethod you used previously. Disable secure linux by editing the "/etc/selinux/config" file,making sure the SELINUX flag is set as follows.SELINUX=disabledThis canbe done using the GUI tool (Applications > System Settings >Security Level). Click on the SELinux tab and disable the feature.The server might need a reboot for the changes to take effect. Create the directories in which the Oracle will be installed.mkdir -p /u01/app/oracle/product/11.2.0/db_1 chown -R oracle:oinstall /u01 chmod -R 775 /u01Login as root and issue the following command.xhost +Login as the oracle user and add the following lines at the end of the".bash_profile" file,# Oracle Settings TMP=/tmp; export TMP TMPDIR=$TMP; export TMPDIR ORACLE_HOSTNAME=<Server hostname>; export ORACLE_HOSTNAME ORACLE_UNQNAME=<db instance name>; export ORACLE_UNQNAME ORACLE_BASE=/u01/app/oracle; export ORACLE_BASE ORACLE_HOME=$ORACLE_BASE/product/11.2.0/db_1; export ORACLE_HOME ORACLE_SID=<db Instance>; export ORACLE_SID PATH=/usr/sbin:$PATH; export PATH PATH=$ORACLE_HOME/bin:$PATH; export PATH LD_LIBRARY_PATH=$ORACLE_HOME/lib:/lib:/usr/lib; export LD_LIBRARY_PATH CLASSPATH=$ORACLE_HOME/jlib:$ORACLE_HOME/rdbms/jlib; export CLASSPATHInstallation
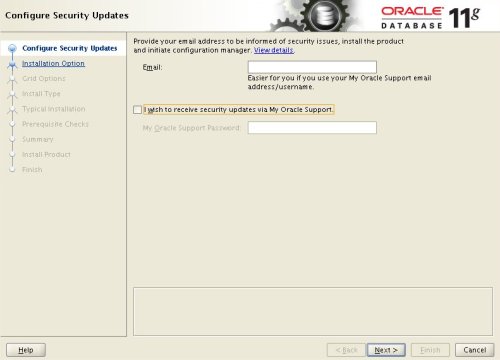
Log into the oracle user .Set the DISPLAY environmental variable.DISPLAY=<machine-name>:0.0; export DISPLAYGo tothe 'database' directory and start the Oracle Universal Installer (OUI) by issuing../runInstallerThis will open the Interface which is self explanatory and will require you to complete the following steps :
- Configure Security Updates
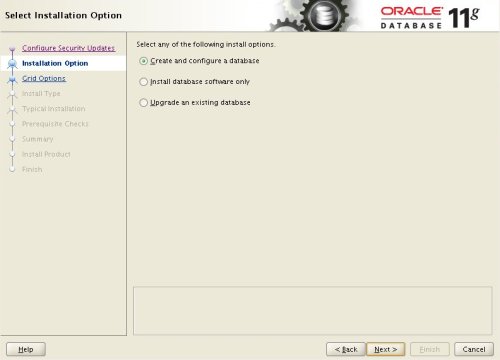
- Select Install Option
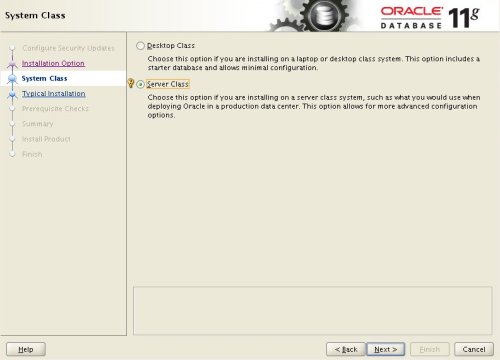
- System Class
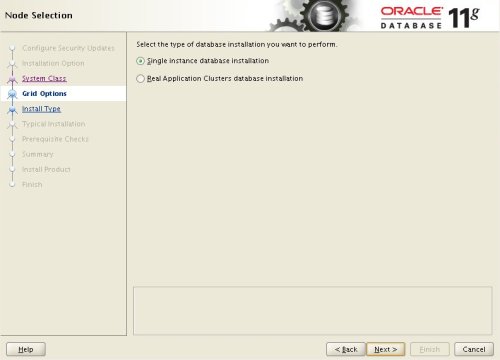
- Node Selection
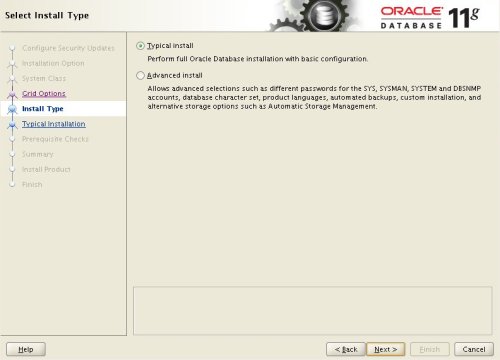
- Select Install Type
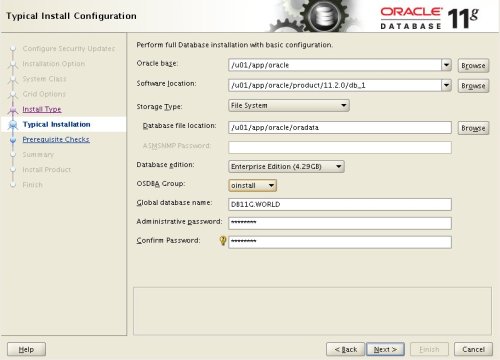
- Typical Install Configuration
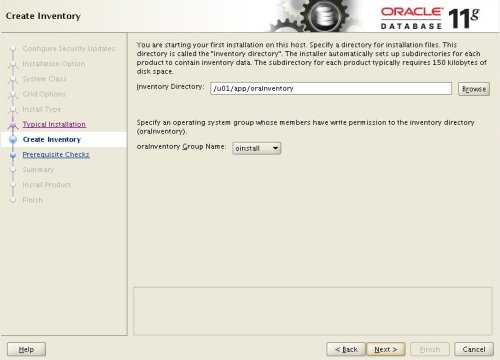
- Create Inventory
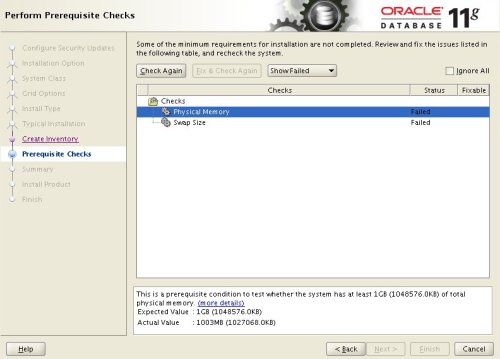
- Perform Prerequisite Checks
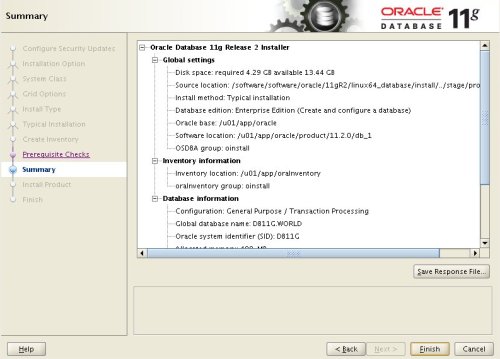
- Summary
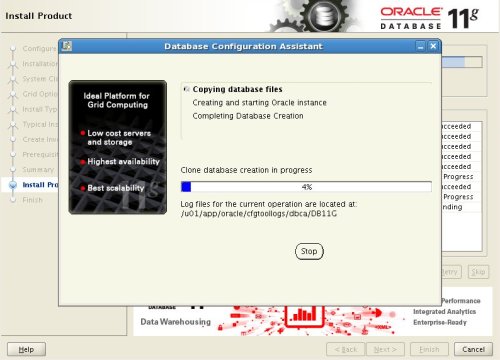
- Install Product
- Database Configuration Assistant
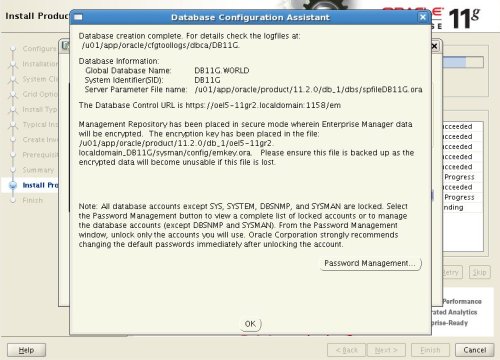
- Database Configuration Assistant 2
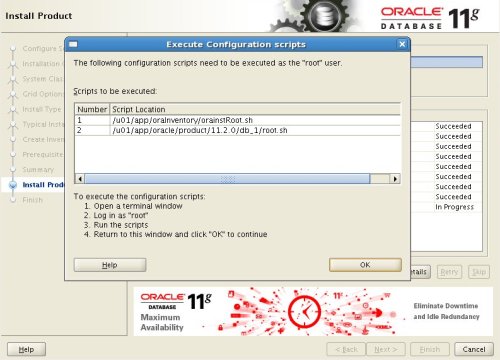
- Execute Configuration Scripts
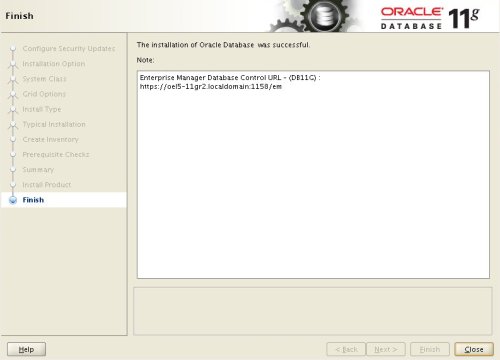
- Finish
Post Installation
Edit the"/etc/oratab" file to set the restart flag for eachinstance to 'Y'.<Instance name>:/u01/app/oracle/product/11.2.0/db_1:Y